3D scanning - a useful tool in the defence industry
Nowadays, 3D scanning is a technology that optimises product quality and streamlines production processes. EXCALIBUR ARMY is no exception and has its own 3D scanners and equipment that form the foundation of 3D modelling and printing. We thoroughly detailed these tools in a previous article.
3D scanners offer an excellent advantage of being compact, mobile and low maintenance. Within the development centre, four trained specialists are involved in 3D scanning.
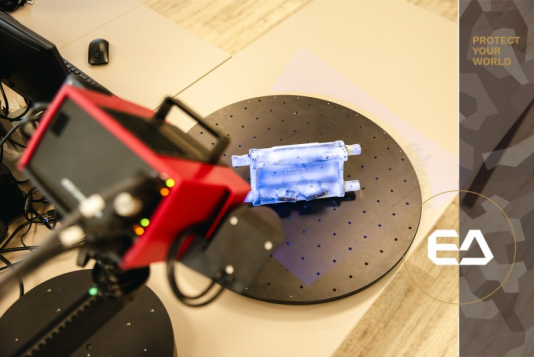
For our needs, we utilise the ATOS Compact Scan 3D scanner with established technology for measuring and inspecting components over a complete area, including molds, models, vehicle interiors, prototypes and other intricate parts. With its high resolution, we can promptly obtain three-dimensional data of the objects being measured. ATOS software is used to run the scanning head, processes the 3D point cloud, and performs data processing and post-processing. Its user-friendly graphical interface makes it easy to solve challenging quality control, manufacturing process and reverse engineering tasks. The scanner includes a stereo camera set up and a bar projector. Specifically, we use this scanner for 3D measurements of small gears, old and more complex castings, complex parts without drawing documentation (e.g. mounting on a PKT machine gun or or scanning a BVP-2 belt link, which was then used for dimensional comparison with a new link from secondary production), or even measuring the chassis frame of an RM-70 rocket launcher.
In addition to the 3D scanner, we employ an innovative measurement system known as TRITOP, which greatly contributes to the technical development and enhancement of the measurement process. TRITOP replaces the traditional touch screen coordinate measuring machines with a camera that can record the coordinates of points on an object and their orientation in space. This data can be used to evaluate various parameters such as surface points, cuts, holes, edges, radii, lengths, angles and more. The collected figures are compared to CAD models to verify precision, shape and measure the part quickly.
TRITOP can work with the 3D scanner mentioned above to facilitate and speed up model creation. When using TRITOP, photographs of the whole part, component, or vehicle are taken, while the 3D scanner only scans the parts that are to be newly produced. The measured data is combined to ensure that TRITOP maintains the complete part's coordinates and dimensions, while the scanned parts are integrated into the model at the fitting coordinates, eliminating the need to scan the remaining parts that will not be produced, hence speeding up scanning and production.


